How To Make Melted Christmas Ornaments Out Of Cups YouTube
Hole punch. Cord, ribbon, or pipe cleaners. Instructions. Preheat your oven to 250° F on the broil setting. Prepare a sheet pan by covering it in tin foil. If using recycled plastic cups, wash the used cups before using. Create a space where your children can use permanent markers stress-free.

Pin on Crafts
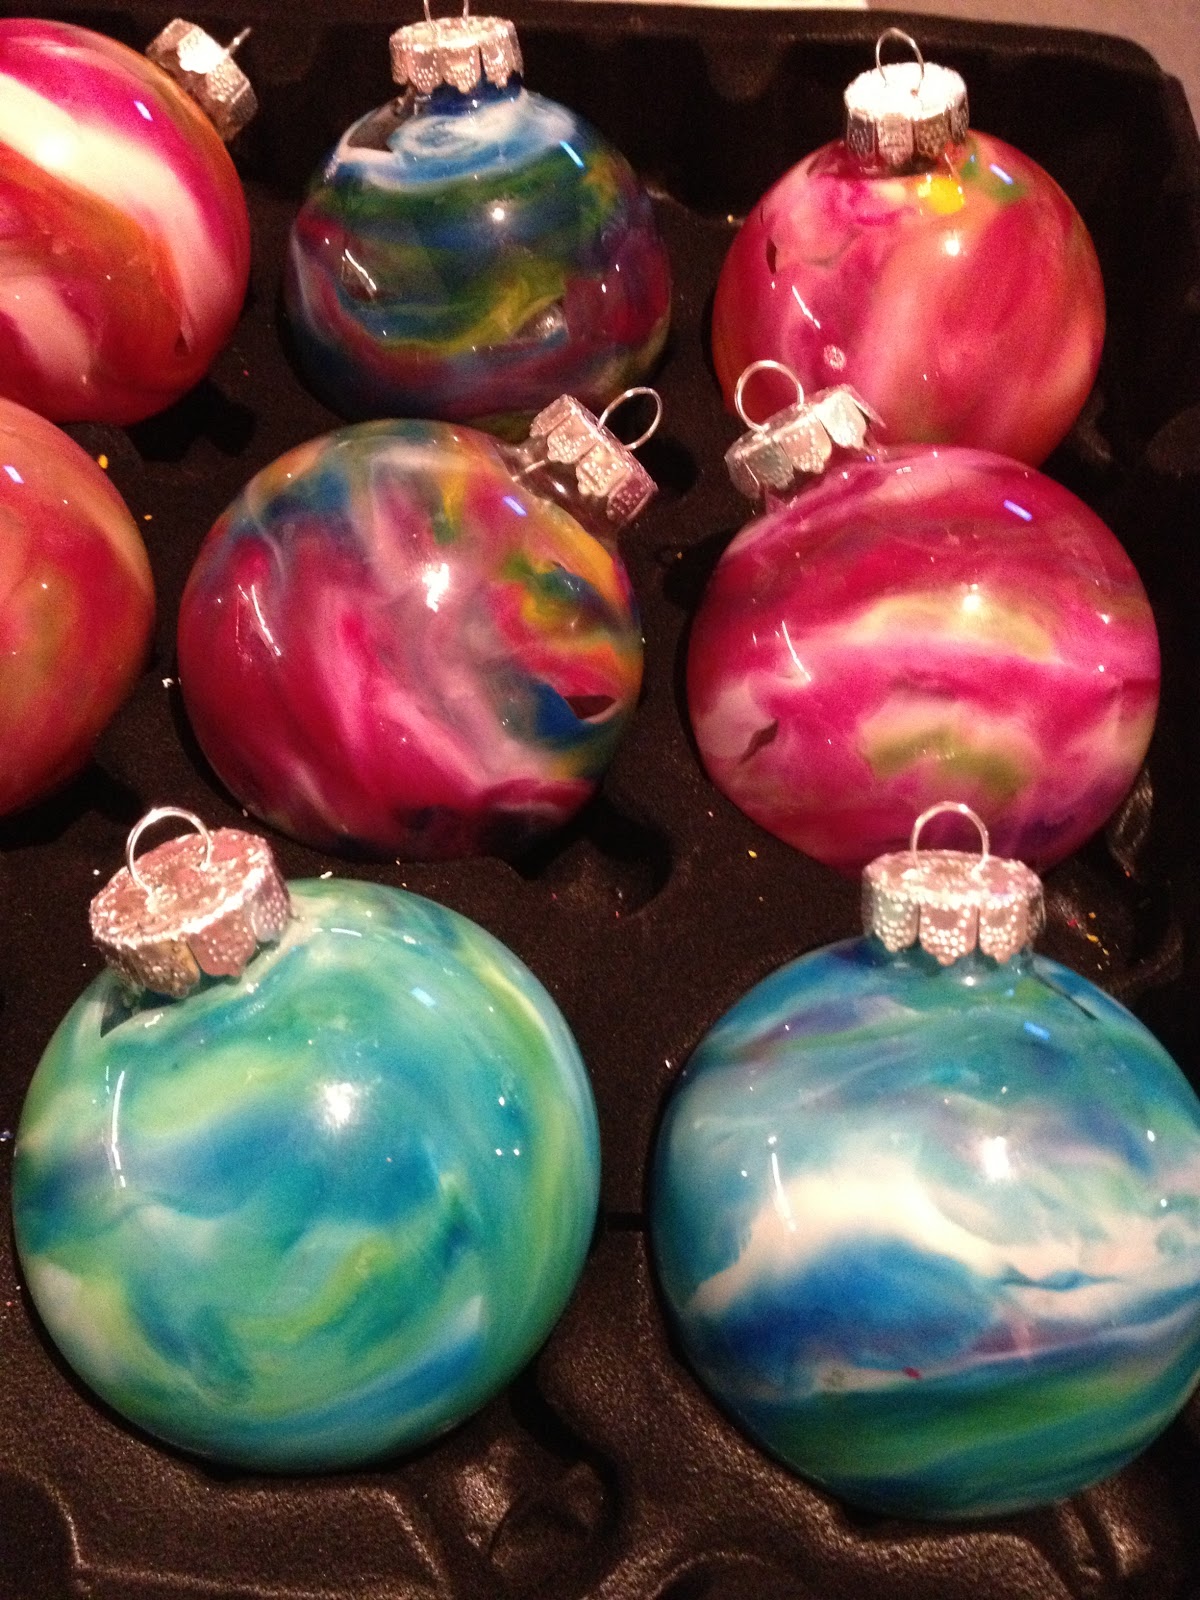
Line muffin tin with cupcake liners. Add 4-5 crayon pieces to each glass ornament. Place one ornament with opening facing up on each cupcake liner. Bake in oven for 10-15 minutes. Remove muffin pan from oven and swirl each ornament until melted crayons coat the inside of each ornament. Work quickly because the crayons cool fast.

EasyMeWorld How To Make Melted Christmas Ornaments
And the joy of finding a Ho Ho or Twinkie lovingly packed away by mom. And when I first spotted a melted snowman ornament online, it brought back memories of the end of yet another old friend.Calvin & Hobbes. Hands down the funniest comic strip of all time. And I especially adored the fun things cartoonist Bill Watterson did with snowmen..

Melted Peppermint Candy Ornaments Christmas Candy Ornaments
3. Open your clear ornament, insert crayon slivers. Open the top of your ornament by removing the pronged silver top. Roll paper with crayon slivers inside. Roll tight enough to insert one end of the paper into the top of your ornament, creating a funnel. Shake crayon slivers into the clear ornament. 4. Heat ornament with a hairdryer.

MELTED CHRISTMAS ORNAMENTS This is an incredibly fun ornament to make
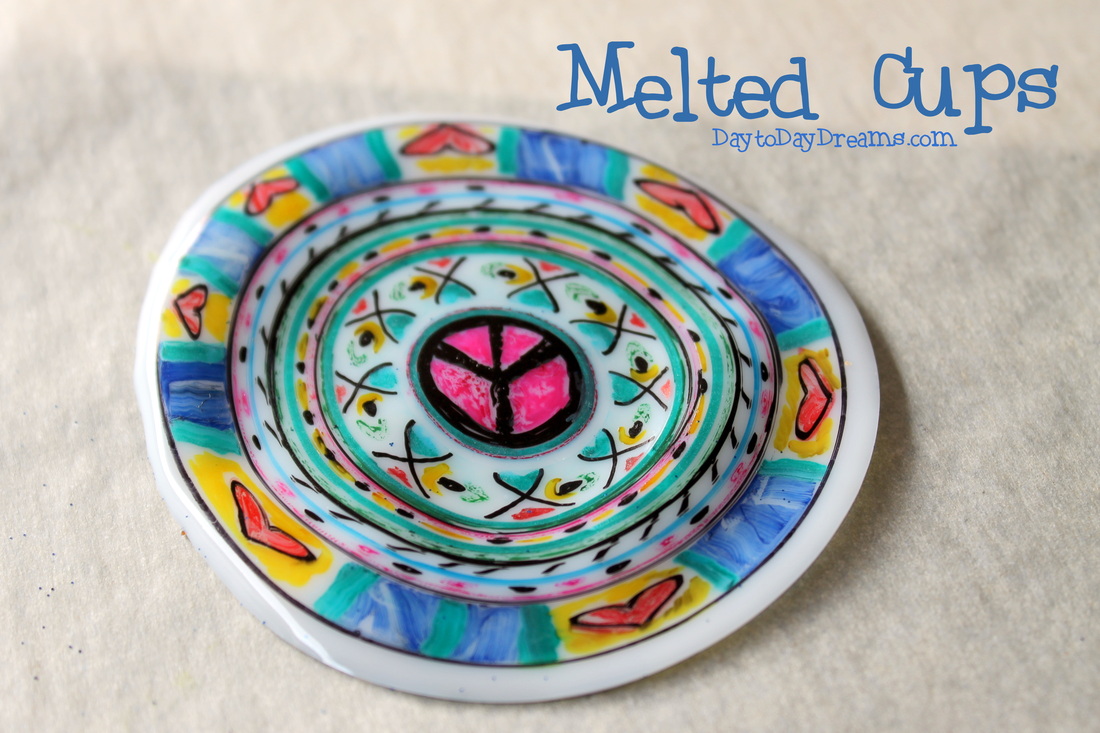
Once the cups are colored, preheat your oven to 350 degrees F. Line a baking sheet with aluminum foil and place the cups on the baking sheet. Bake the plastic cups for 3-5 minutes- until they are melted and flattened. Remove from the oven and allow them to cool completely before touching them or removing them from the tray.

Easy DIY Melted Bead Christmas Ornaments YouTube
Place the pan into a cold toaster oven then bake at 450F for 8 to 12 minutes. (Mine took 11 minutes, but it was a cold day) Remove the pan from the toaster oven when the beads have completely melted together, but before they start to bubble. Place the pan in the freezer for 10 minutes to cool.

Colored clear plastic cups, melted in oven at 350 degrees for 10
Preheat your oven to 170° F. While it's heating, cut or break each crayon into roughly half inch pieces and drop six to eight crayon chunks into the bottom of each ornament. Step 4. Place the ornaments in a muffin tin lined with paper muffin liners, with the open end facing up. Step 5.
Melting Cups
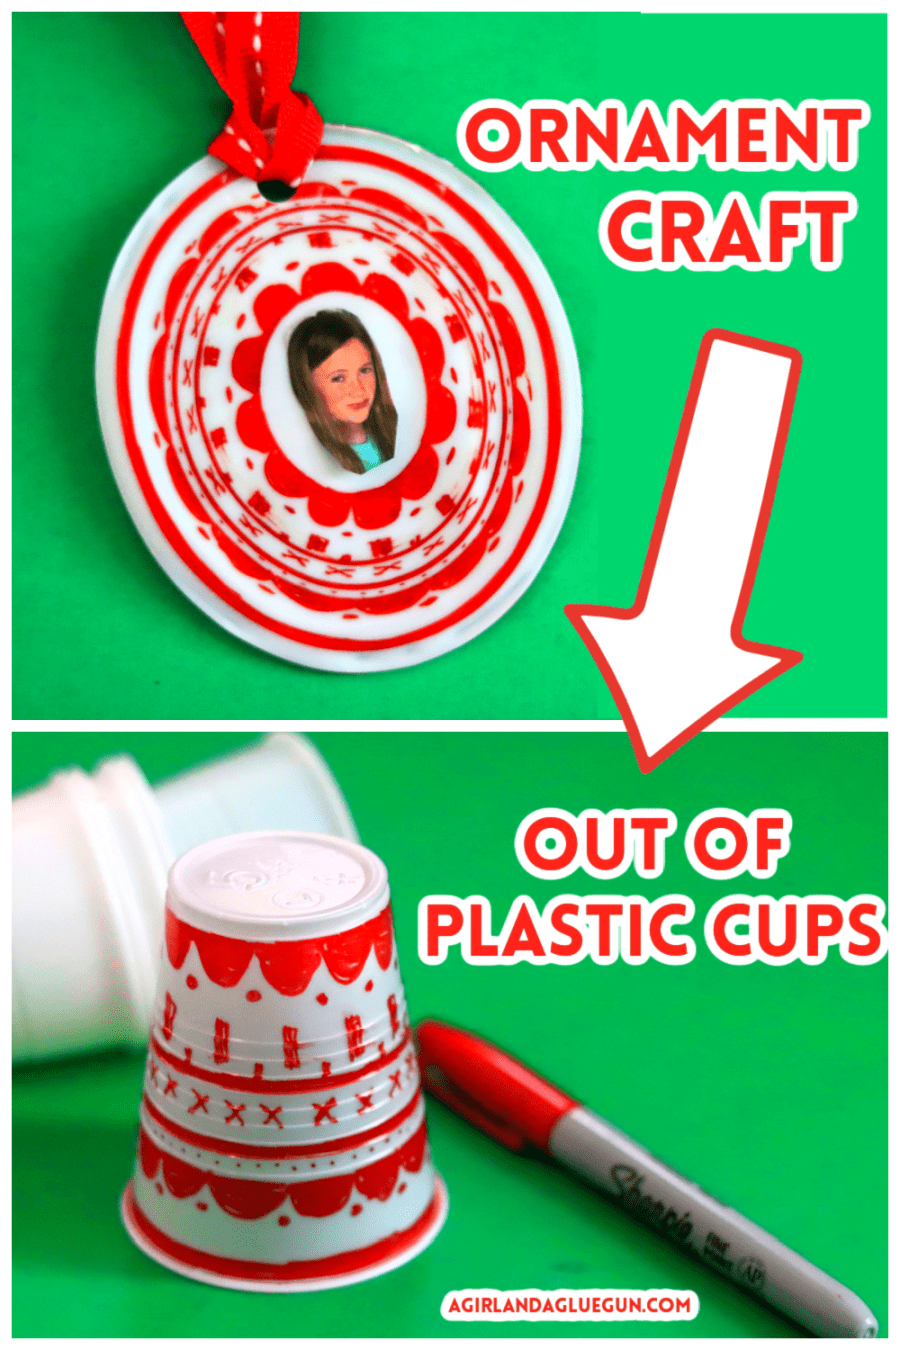
How to make shrinky dink ornaments: Draw with permanent markers on plastic cups. (Remember that they have to be Polar brand!) Hole punch the cup. Place on cookie sheet and put in 250° oven. Turn the oven light on and watch until the cup shrinks down to a flat circle. Note that only the ornament in the middle of the cookie sheet will be.

EasyMeWorld How To Make Melted Christmas Ornaments
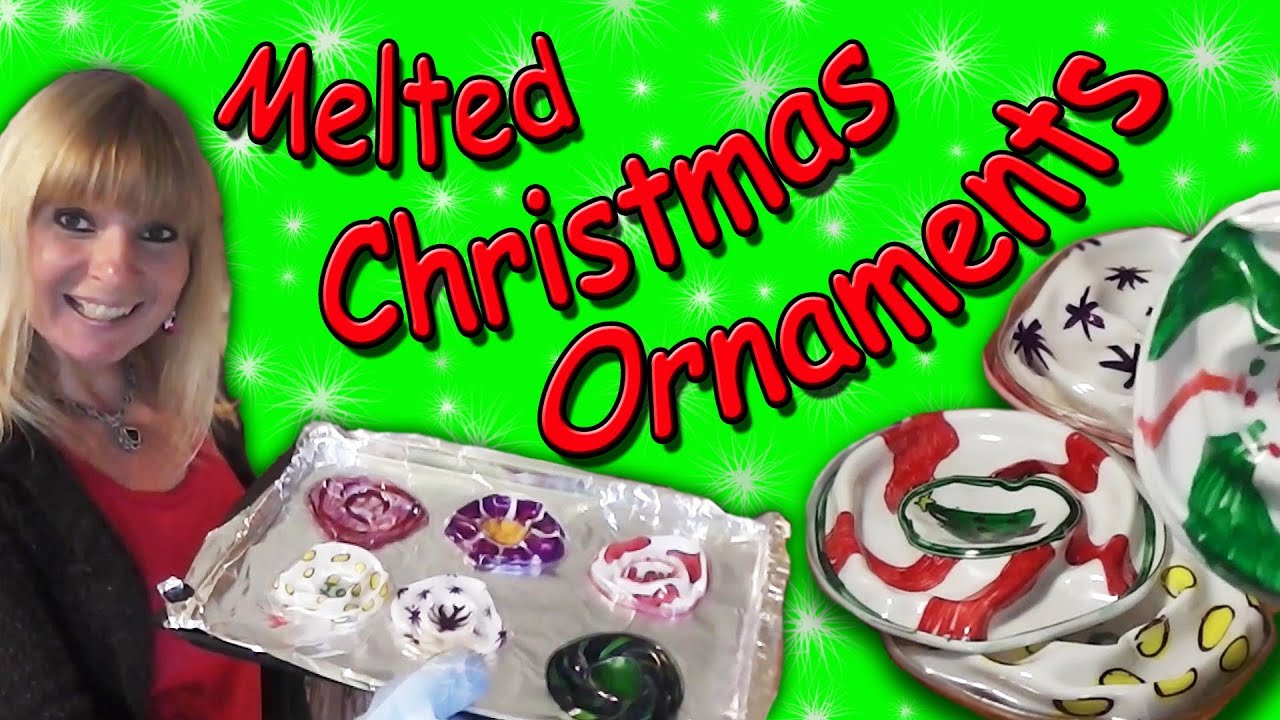
The original cups I used were pretty good quality, but #1 plastic. I bought some cheap plastic cups that were made from #6, and tried an experiment. Using permanent markers I drew bands of color around a cup, to emulate the Kadinsky circles from the original idea. Then I drew scribbles on another cup to emulate a toddler's version.
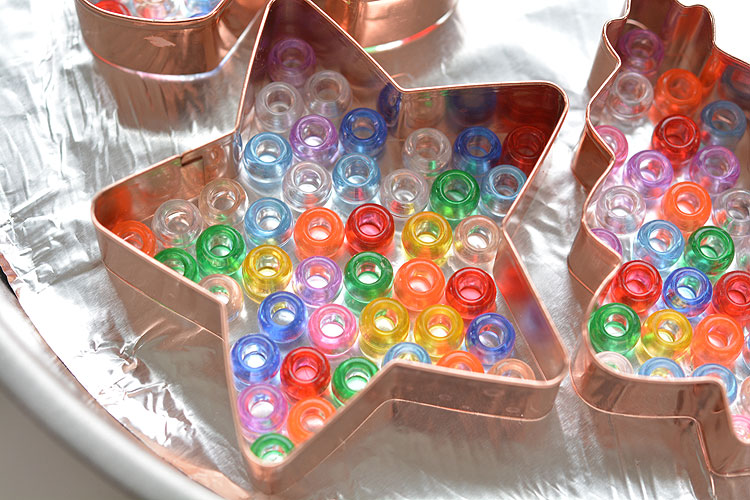
Melted Bead Ornaments Pony Bead Christmas Ornaments
Size 5 clear plastic cups #6 (found on bottom of cups) Kids use permanent markers to color and decorate the outside of the cupsBroil for a few seconds. Keep.
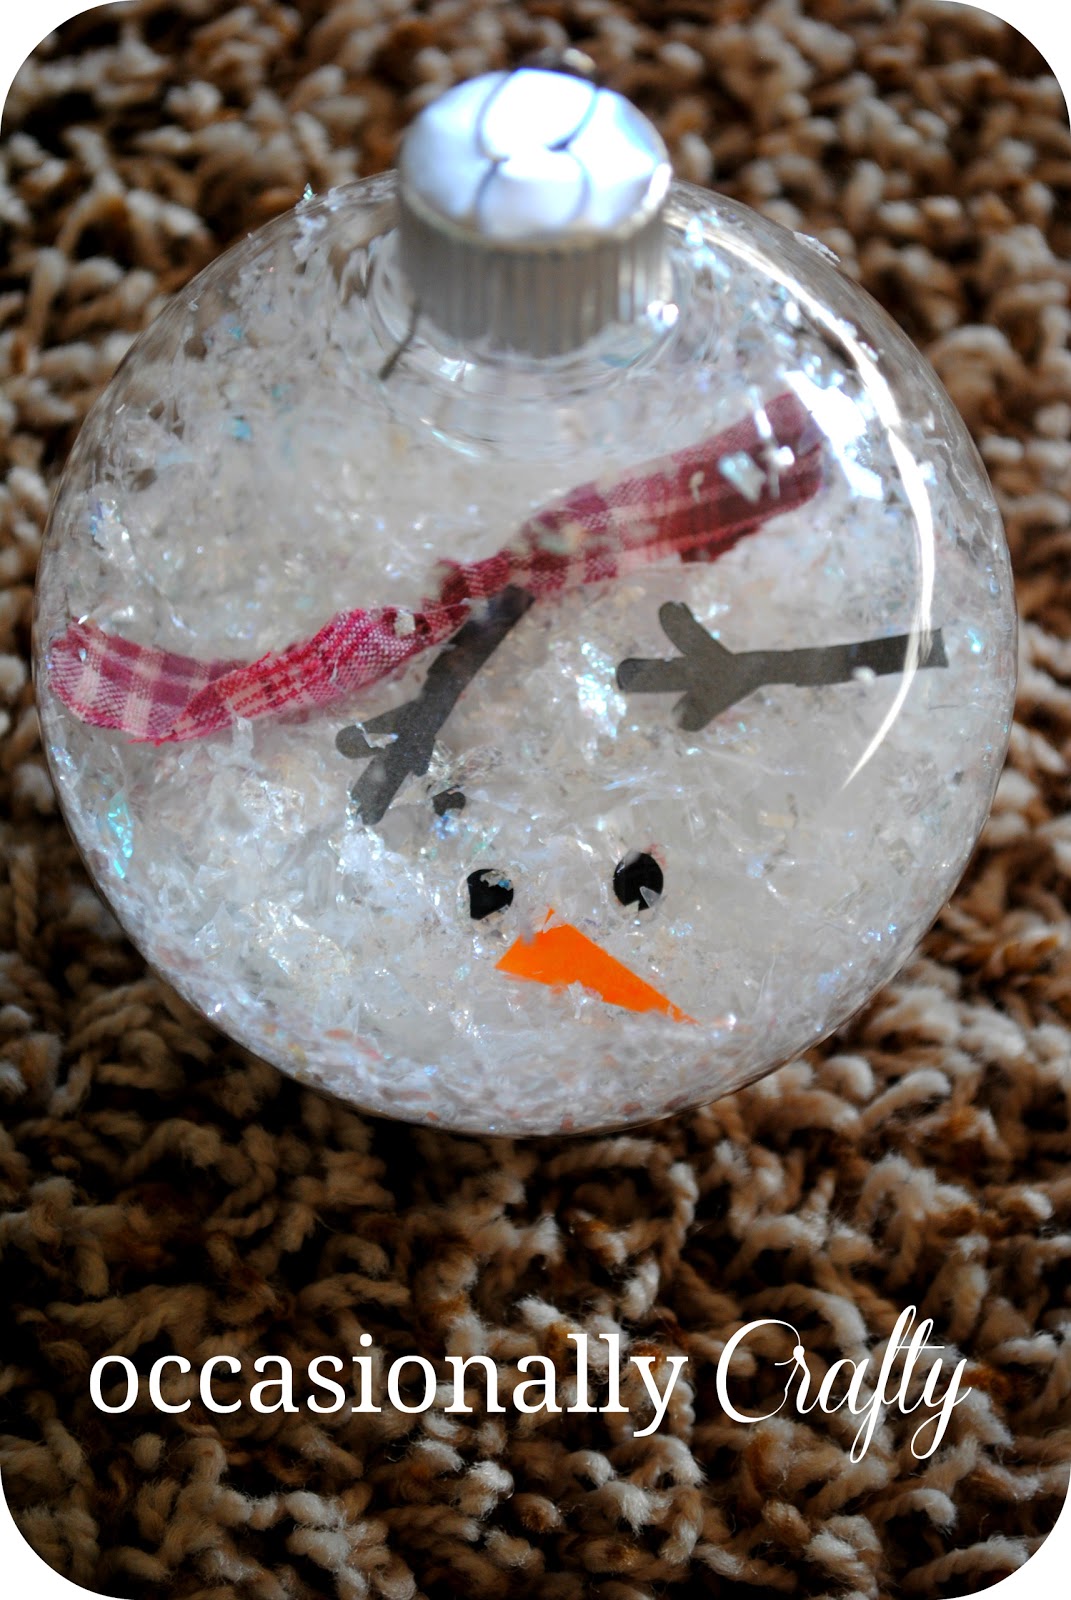
Melted Snowman Ornament Occasionally Crafty Melted Snowman Ornament
Make a few holes around the outside of the cup to be sure that at least one of the holes does not melt closed. During our experiment we punched 2 holes. One hole closed up but the other did not. It is also MUCH EASIER to punch the holes in the unbaked plastic. The plastic becomes brittle after it is baked and it was easy to break while punching.
Living, Loving, Laughing, & Creating Everyday Melted Crayon Ornaments!
Next, you want to grab a cookie sheet, and line it with aluminum foil. Put the completed plastic cups upside down onto the cookie sheet. The flat bottom should be up in the air. Allow plenty of space in between each cup so they don't melt together. Preheat your oven to 400º Fahrenheit (205º Celsius).

Melted Plastic Cup Ornaments Plastic cup crafts, Melted plastic
We designed cups with sharpies and then melted them in the oven to make Christmas ornaments. They turned out really awesome everyone should try this!
Ornament craft for kids A girl and a glue gun
In a microwave, heat them for one minute. Allow the crayons to completely dry before placing them in a bowl. After the molding has dried, remove it. Soak the crayon in hot water for a few minutes before releasing it. When you use water to soften the paper, it will be easier to remove.

EasyMeWorld How To Make Melted Christmas Ornaments
DIY Christmas Ornaments Made With A Plastic Cup

Melted Plastic Cup Ornaments Xmas crafts, Melted plastic, Preschool
1). Preheat your oven to 450 degrees. 2). Place tin foil on a baking tray. 3). Decorate your cups using your Sharpies. I tried various ways of doing this- coloring the entire cup, coloring parts of the cup, and coloring/decorating the ornaments after they melted. See my tips below for more details on that. 4).
